How to size
Step 1
Use a soft measuring tape and lay it across the widest part of your nails, making sure the tape is pulled tightly to account for any curvature, repeat for each nail, writing down the width of each nail in mm. If you do not have a soft measuring tape use regular tape and press down to account for curvature, mark each edge on the tape. Place the tape flat next to a ruler and write down the width in mm for each of your nails. Tape and ruler method shown below.
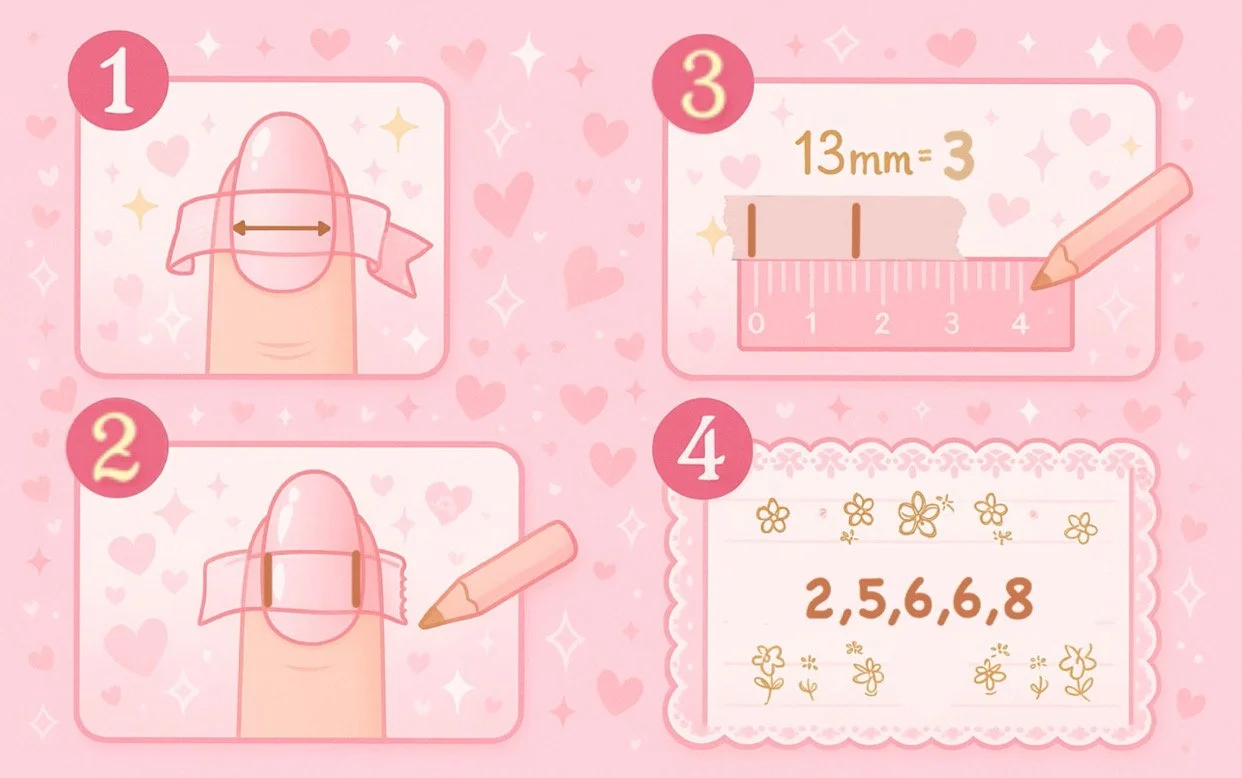
step 2
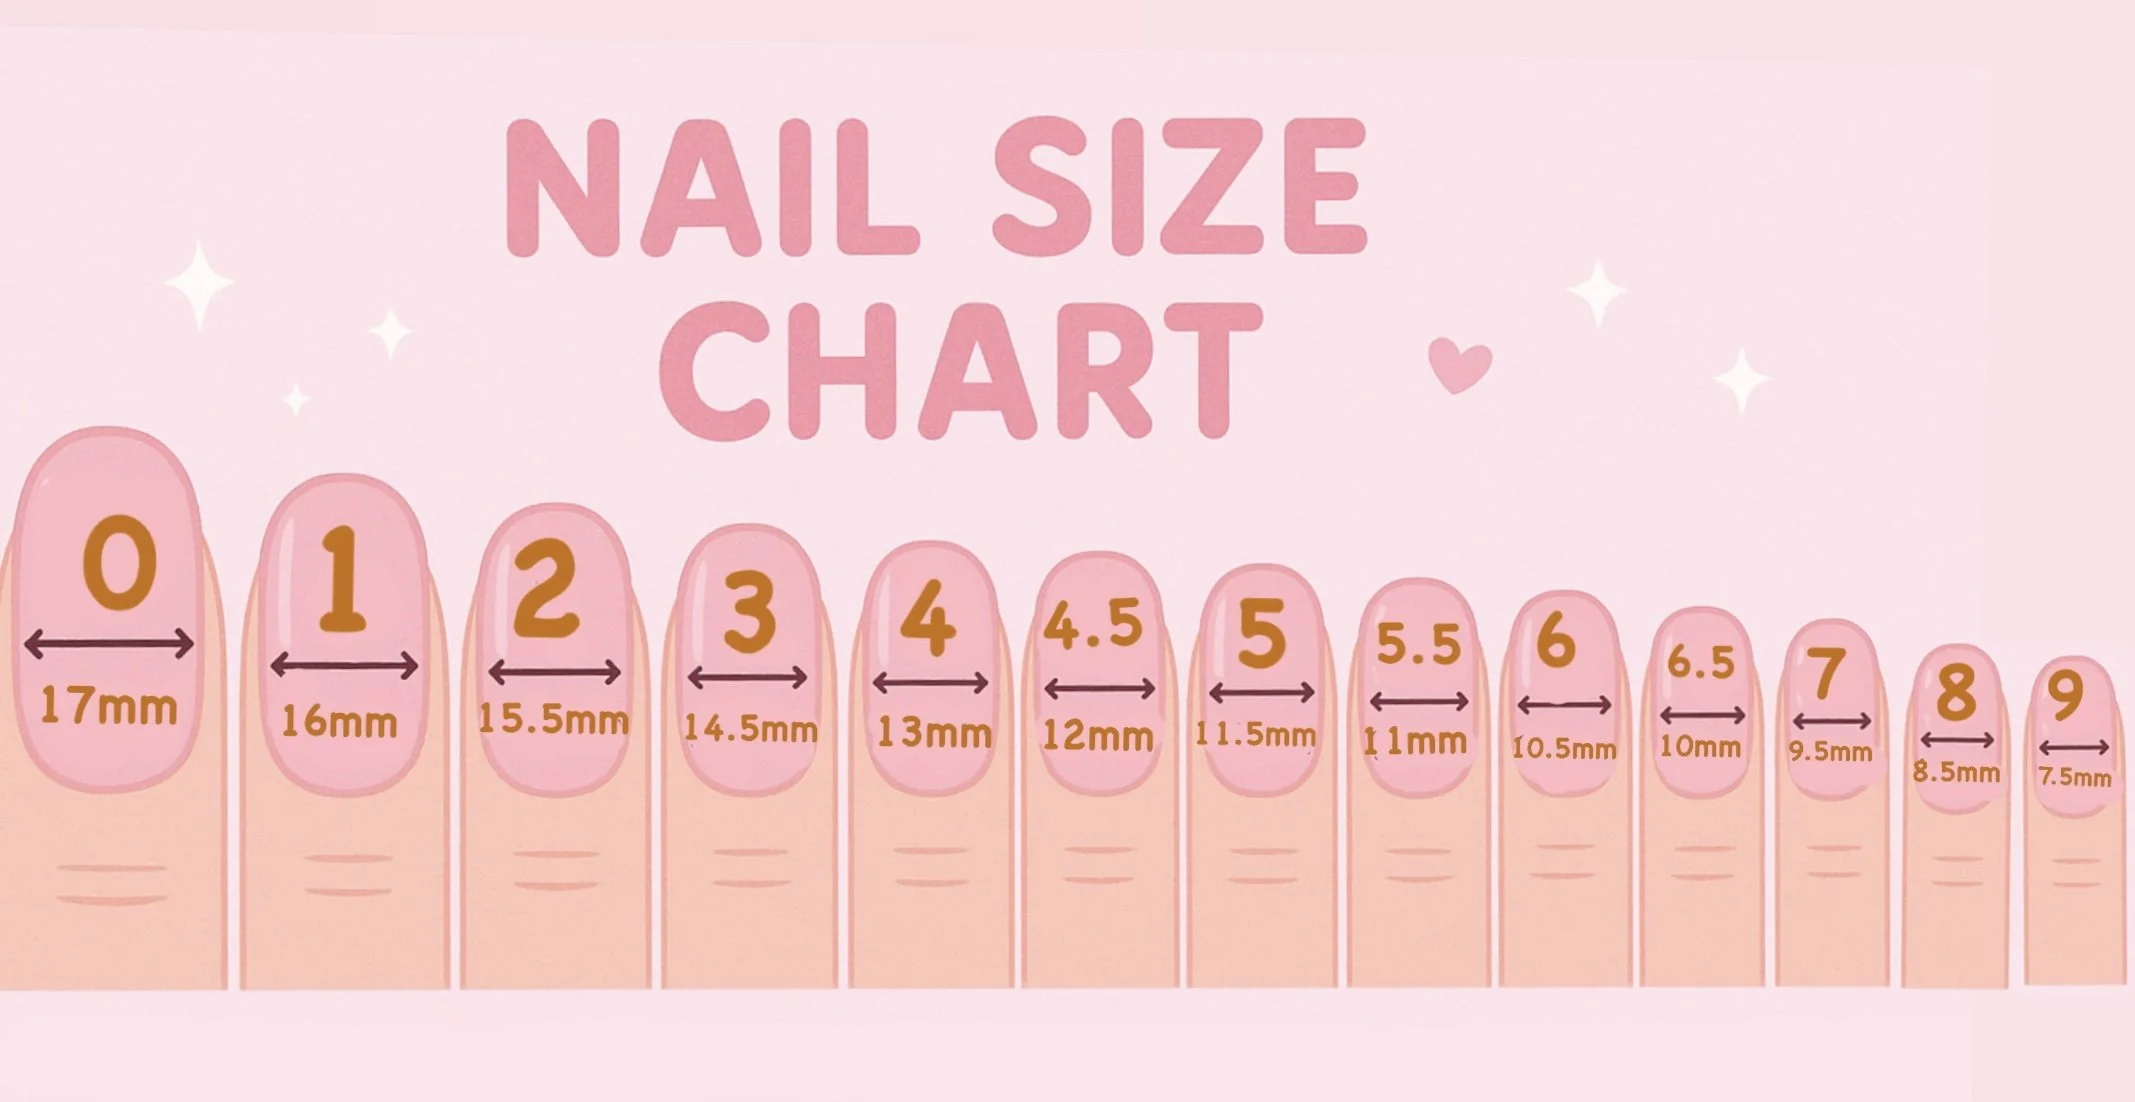
Once you have determined the width of each of your nails in mm, use the chart and determine your individual nail sizes and the corresponding kit to select (xs-l)
if you are in between sizes it it best to size up and file down to fit your nails.
If your nails don’t fit any of the standard sizes select ‘custom’ and enter your individual sizes in the notes when checking out in the following order: thumb, index, middle, ring, pinky. (Eg. 2,4,5,5,8)
If you are still unsure please contact @ajcnailsperth prior to ordering.